We just finished teaching an online masking class, and participants had a lot of good questions. But by far the biggest confusion came from what does ‘intersect with subject” or any other mask really do? And is it really necessary?
The new masking features in LR and PS have changed workflow for about every photographer I know. It is just so simple to select a part of your image and apply targeted editing to the selected area. A few years ago this was much more difficult. Now with AI computing we just hit a button and watch the magic happen.
One feature that is still developing with the new masking tools is being able to refine and fine tune your selection. Yes, there are some range sliders and feathering you can use with the brush tool. But sometimes you wish you could further refine your selection. That is where ‘intersect with’ comes in to play.
Think of ‘intersect with’ as another way of saying mask overlap. When you interest two masks, the parts that overlap will be where your adjustments occur. That is all there is to it. For some reason ‘intersect with’ causes confusion….it just doesn’t sound like overlapping masks to me.
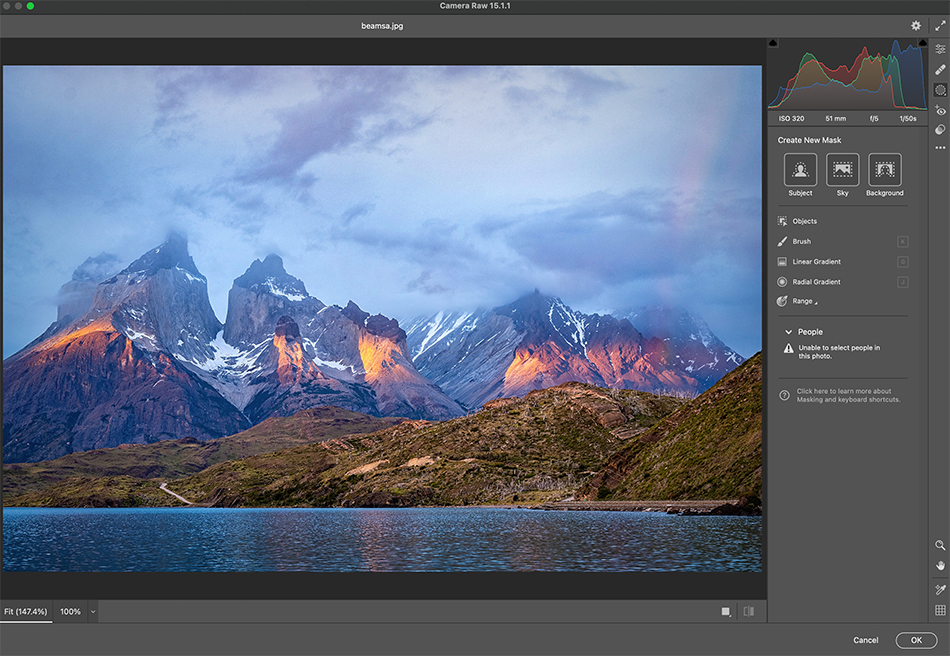
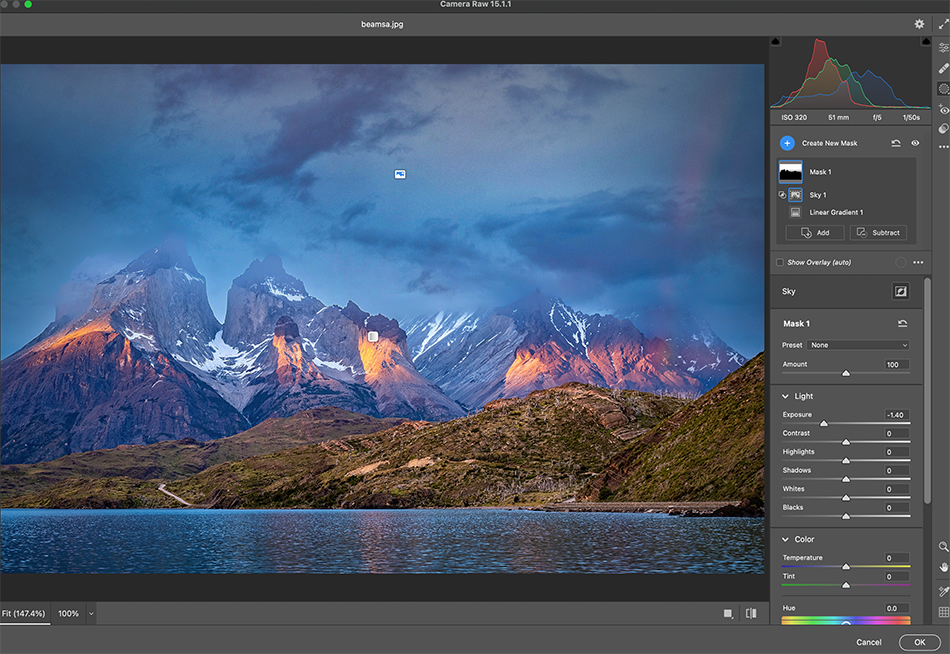
Here is an example. This image is from Las Torres Del Paine NP in Chile, an iconic location. I wanted to darken and add some mood to the clouds behind the mountain. If I hit ‘select sky’ for my mask the sky would be selected, but there would be no gradual transition into the foreground…the effects would be very obvious and not natural looking.
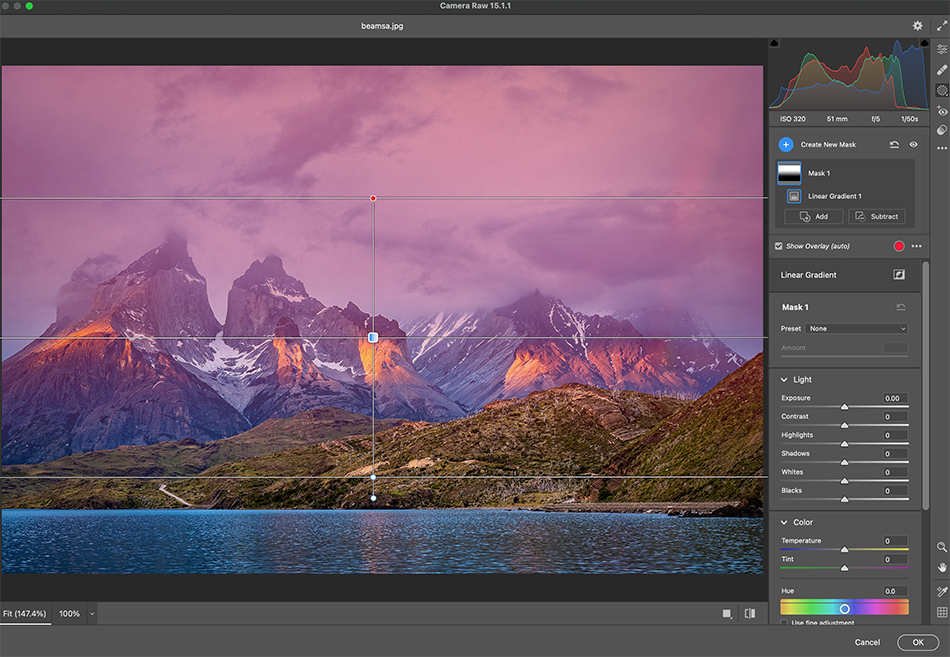
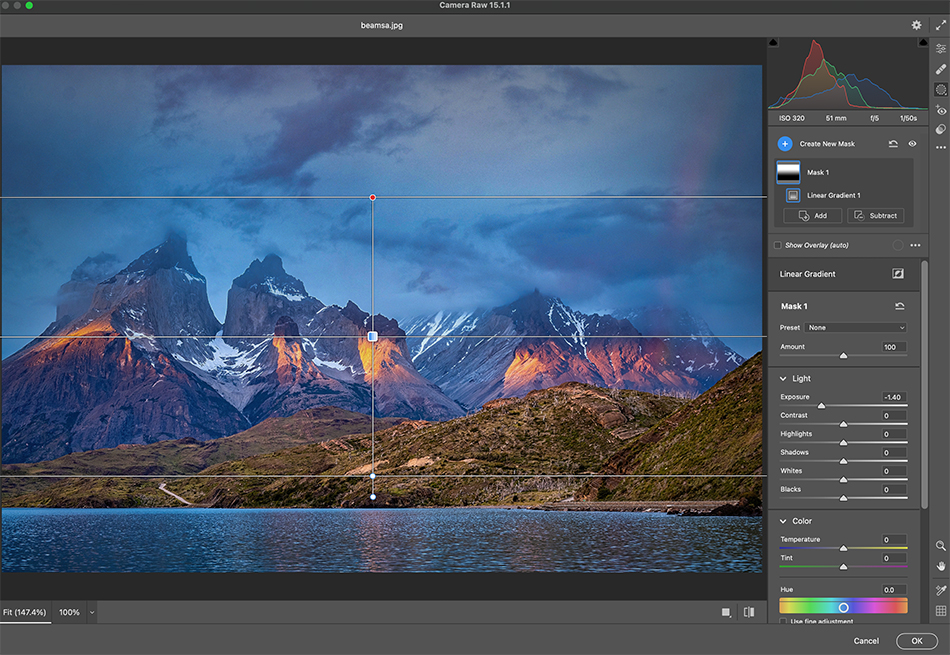
So instead I chose to use the linear gradient mask to feather my darkening effect down the image towards the lake. But the linear gradient also adds darkness to my mountains, not what I wanted.
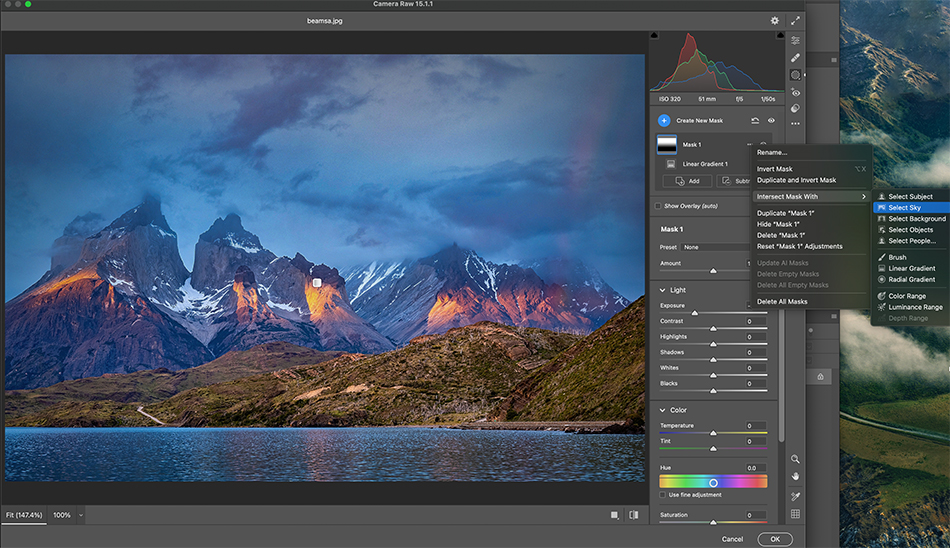
To fix this problem I choose to intersect the linear gradient mask with the sky. Since the mountains won’t be selected, the only overlay will be in the sky area, leaving the mountains untouched.
The end result is I get a nice feathered darkening of my sky into the foreground, but without darkening the mountains. The two masks ‘intersect’ in the sky, leaving everything else from being affected.
You could also ‘subtract’ from your linear gradient using the brush; just brush over the mountains to remove them from the mask selection. As with so many things in editing, there are a lot of ways to get the same result. Masking is a powerful tool, a regular part of my workflow, and something that will continue to evolve in the future.
