
Earlier this year we were in Texas photographing birds from blinds on a workshop…you can see the trip report here. One day we had overcast skies, and the question came up can you replace gray skies using Lightroom. The short answer is yes. I know some photographers are cringing at the though of swapping out skies in a wildlife shot, questionable ethics perhaps? I’ll let you decide if this is for you, but there is a simple way to do it using a range mask in LR.
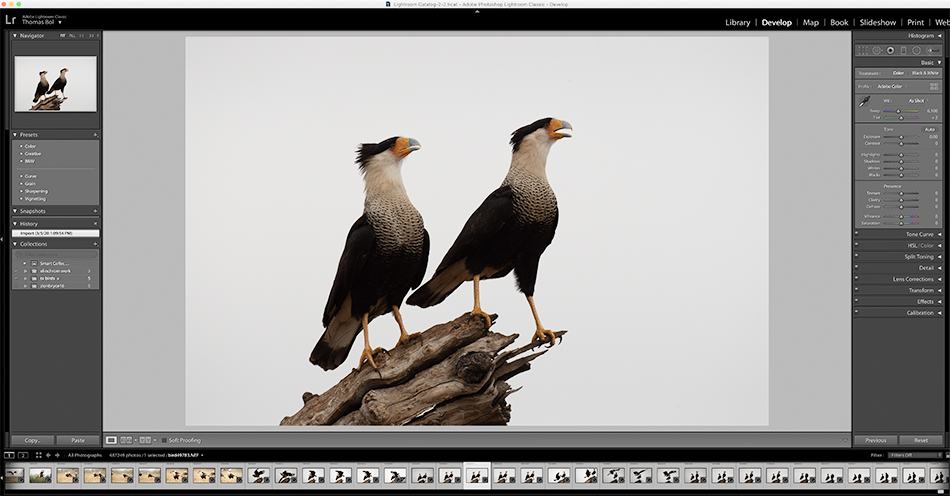
Here is the image. Nice shot of caracaras on a limb. And honestly I think with a little developing they would look fine on a the gray sky. But what if you wanted a blue sky?
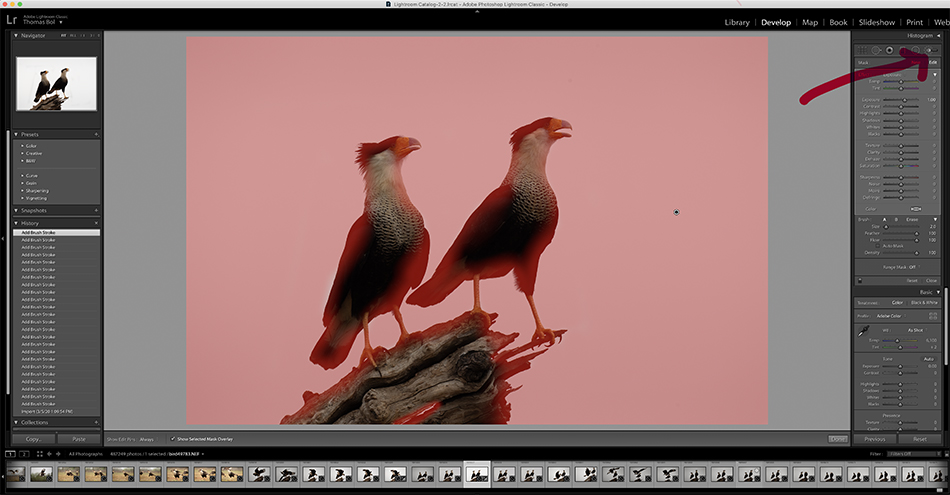
First, choose the adjustment brush and brush over the sky. Use a large brush, and don’t worry if you brush over the birds and limb on the edges, we will take care of that later. I hit the ‘O’ key to show the mask (default color is red) to help with my brushing.
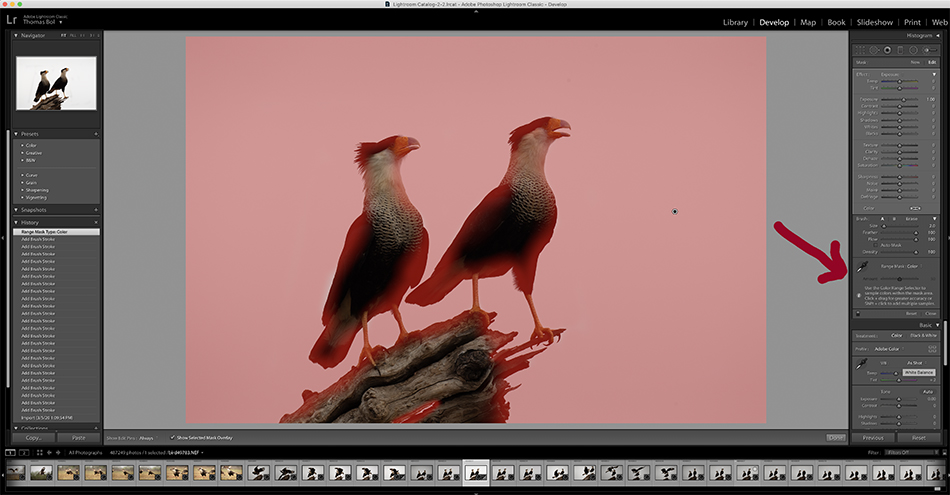
Next, choose the Range Mask option show above, and choose color from the drop down menu. Now, click on the dropper tool, move your cursor into the white area, and either click or click and drag to create a small rectangle…both ways will sample the white background color. Use the adjustment slider in the box to refine the edge of your selection.
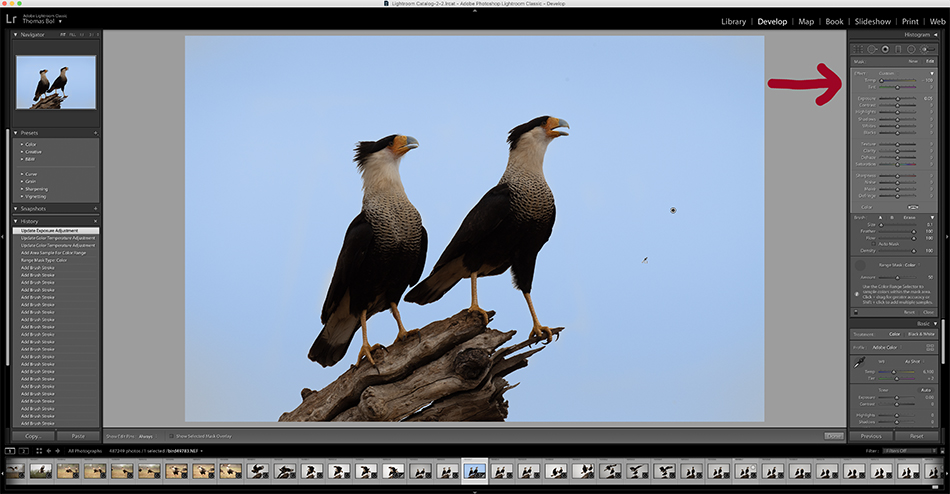
Now the fun begins. Go to the color temperature slide at top and drag it left towards blue. Presto, your sky just changed colors. You can also change exposure values to darken or lighten the color of the sky. You can even create pseudo clouds by leaving some areas in the sky unbrushed. These will remain white while the brushed areas will go blue.
As you can see, this is a very quick way to transform skies. The image at the top of the post shows the final result. Ethics? What ethics!