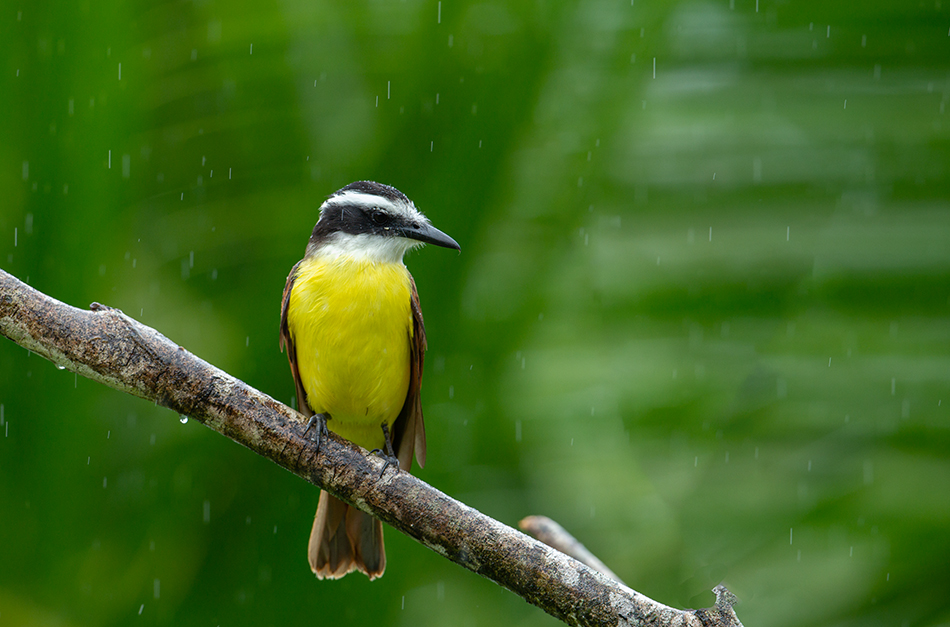
Costa Rica
I can’t count the number of times I have photographed wildlife and wished I had a longer lens. If possible I always try to fill the frame in camera for tight wildlife shots. But what happens more often is I have to crop down from an existing image. One of the great things about the Z7/D850 is the 45MP sensor. I get a huge file and have lots of room to crop. But my favorite wildlife camera is the D6, which is 21 MP. Cropping from these files doesn’t give you much space to crop. In the past I have tried various third party plugins to enlarge my heavily cropped images to get a decent file for printing. The results have been pretty good, but with limitations for sure.
But a few days ago Adobe did an update to Photoshop and Camera Raw, and now we have Enhanced Image-Super Resolution. I think this is going to be a game changer for many photographers. In a nutshell, Super Resolution doubles the resolution of your RAW image and gives you a file size four times as large. My D6 21MP camera gives me a 60MB file in Photoshop. Using Super Resolution gives me a 240MB file…huge! I already print 24×36″ prints from my D6 and they look great, razor sharp even if I look close. With a 240MB file the sky is the limit. But only if the enlarged image looks good….and they look fantastic! I was blow away at how sharp and detailed the enlarged image was at 100 and even 200 percent on my computer. I was getting better results than when I enlarge using other methods in Photoshop, and better results than using third party plugins. And the process was fast (plugin enlargements can take quite awhile).
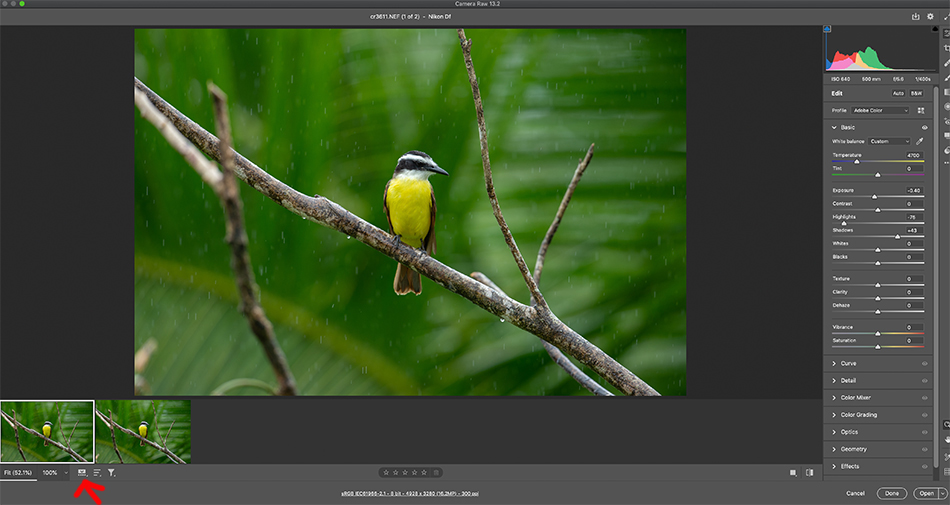
Here is how it works. First, make sure to update your version of Photoshop and Camera Raw via the Creative Cloud so you have the latest version. Next, open a RAW file in Photoshop (you can use this technique on jpegs via Adobe Bridge but I’m guessing everyone is shooting in RAW). You can do your adjustments now or after enlarging the image. Another thing you want to do is make sure you have your filmstrip view turned on. Just click on the little icon on the lower left (see red arrow on image above).

Now, either right click on the photo or click on the three dots at the bottom of the tools on the right side (see image above). This brings up the Enhance on the drop down menu…choose it.
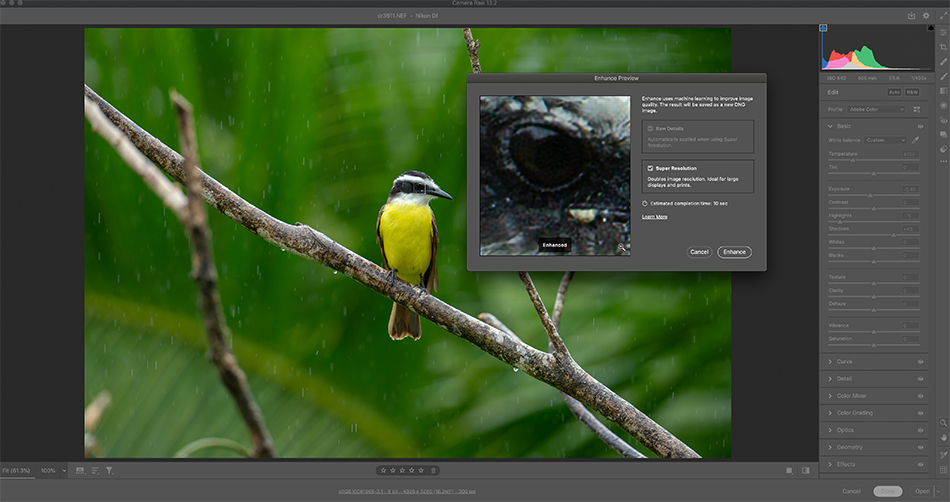
From this dialog box, choose Super Resolution, and click ‘Enhance’. That’s it! You can watch the progress in the lower left corner, it will take a few minutes to res up your file depending on your computer speed and file size. Once the super large file is done, it shows up to the right of the original in the filmstrip. The new file is a raw DNG file….so you have new but much larger raw file to work with.
A few other notes. Any up-sizing program or action depends on a razor sharp image to start with. If you have a tack sharp image, the enlarged image is going to look great. But if you have a duck photographed at a 100 yards away with atmospheric haze and just slightly less sharp, the results won’t look as good. But I have been very impressed with Super Resolution. I really think this is going to be a great fix for photographers printing at home using small files and wanting more size for a large ink jet print. If you are starting with a really large file then Super Resolution will probably give you more than you need. Good news for Lightroom users, this new feature will be added shortly!