
Masking has taken on a whole new meaning with the recent masking features in PS and LR. It’s crazy isn’t it? Before masks we were using the ‘old’ tools to make selections, refine edges, and hope that things came out okay. But then the new masking features were introduced, and now I seem to use masks on about every image I edit. It is just so easy….select sky…select subject…brush…it is amazing how well masking works with one click.
But remember luminosity masking? Or maybe you heard about it, and really didn’t give it much attention. But you know the scenario…you go to your photo club meeting and that one person goes into detail how they used luminosity masking for critical adjustments on their award winning photo. You nod your head up and down saying of course luminosity masking was so important…but really you are thinking what in the world is that and does it really matter (yes, I have been that person wondering about so many things at creative meetings…just nod your head…look interested…and read up on it later!). Does luminosity masking really matter with the new masking features in LR and PS? Aren’t they the same thing?
Let’s break it down right now. First, luminosity masking is different from the new masking (select sky, select subject…etc). Instead of selecting subject matter, luminosity masking selects brightness areas (luminosity). What makes luminosity different, and important, is its ability to accurately select tonal values in an image, resulting in a feathered, more accurate selection for certain edits. Also, you can refine luminosity masks to precise levels giving you control of areas in an image you won’t get using masks, highlights, shadows, graduated filters…
So do I use luminosity masks on all my images? Not even close. Honestly, the new masking features in LR and PS are what I use the most. But occasionally I will find an image with specific brightness areas that need to be adjusted, and the only way to accurately select them is a luminosity mask. Let me walk you through one example.
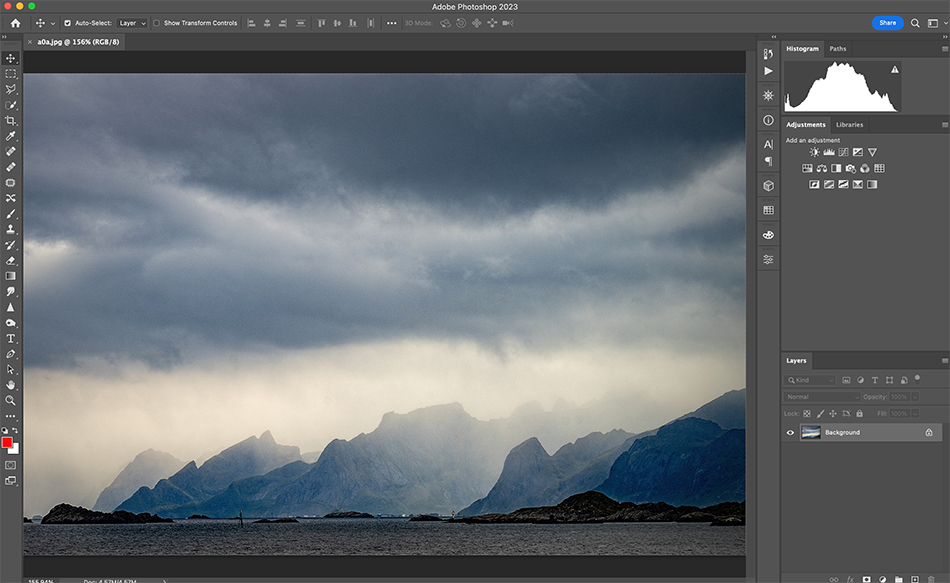
Take a look at this image above in Lofoten, Norway. A classic stormy landscape image, but the shot has some really bright areas in the clouds. These are areas I would like to select and adjust. Using the Highlights slider won’t be precise enough, it will affect other areas, and a graduated filter also won’t work. This would be a good image to use a luminosity mask.
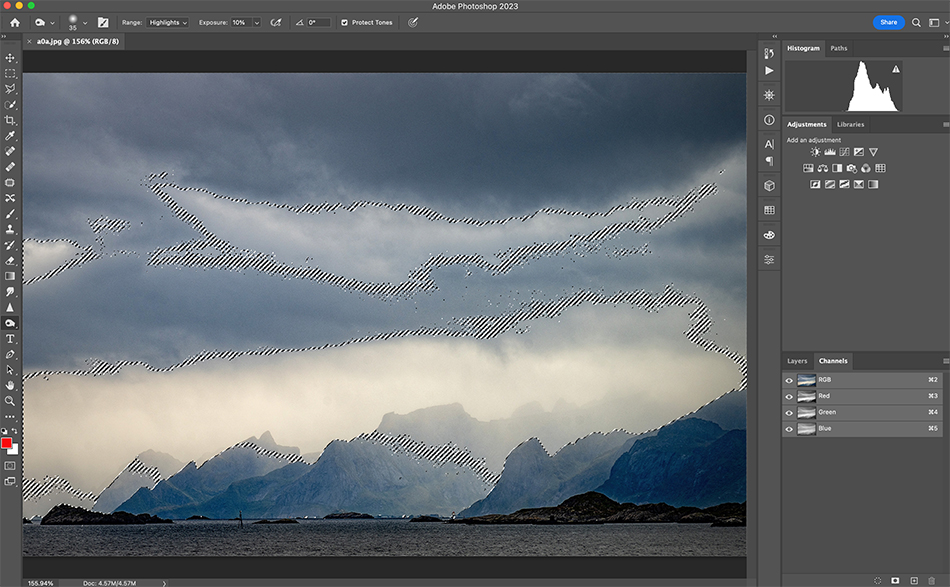
The first step is clicking on the channels palette. If you don’t see this in your window, go to Window in your menu and click Channels. You can see above there are four channels. Next, holding the Command Key down, click in the RGB window icon (the photo). You will now see the luminosity mask selection via the dancing ants circling the bright areas in the image.
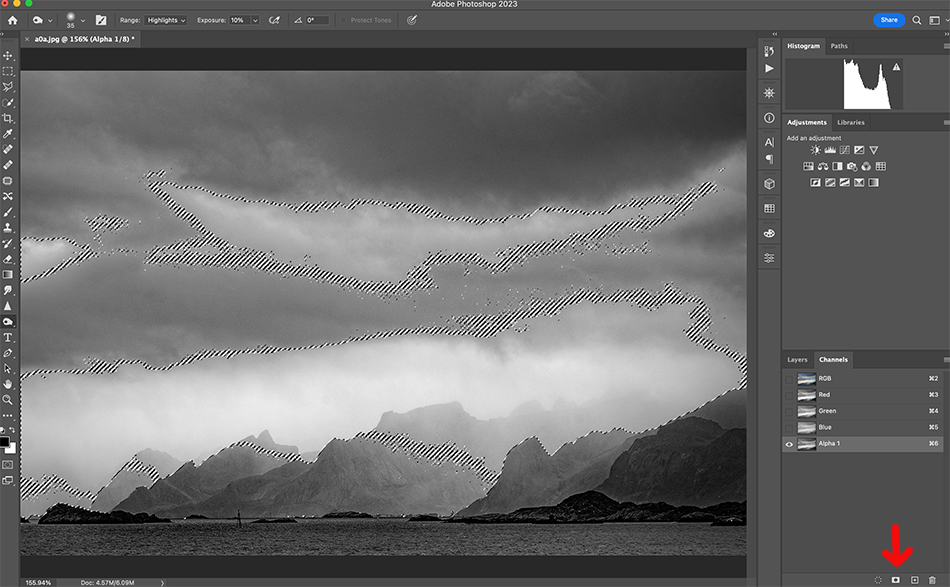
With this selection still active, click on the small icon at the bottom right in a white rectangle with a small hole in it. This will create a new channel, Alpha 1, and the image is black and white. This is your first luminosity mask. Just think of this as a mask selection, one that is based on brightness values, that you can use to adjust the image. But what if the selection is too broad? I really only want to adjust the bright clouds in the center, not the mountains.
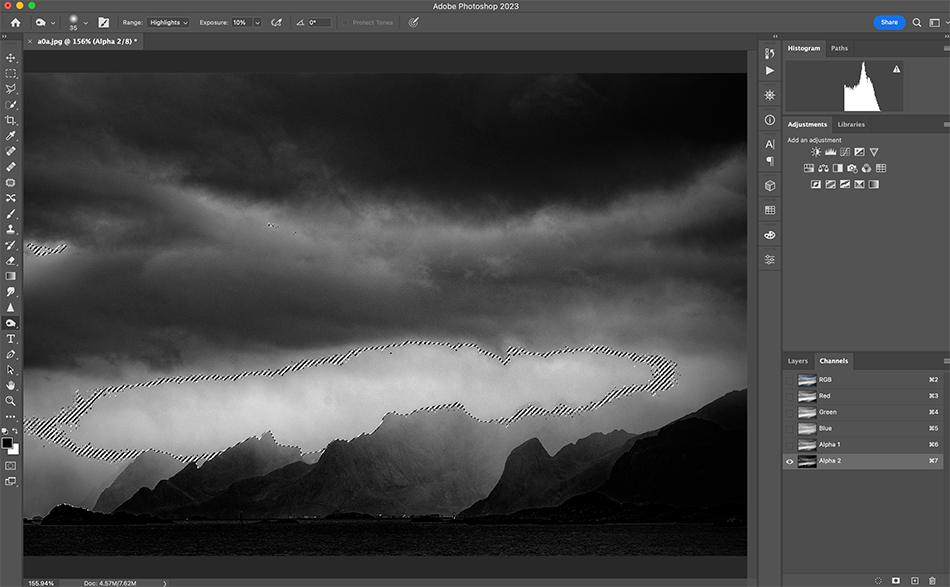
To narrow your selection of luminosity values, you are going to click in the new alpha icon. But here is the key! You need to be holding down the Command, Option and Shift keys at the same time (work that finger dexterity). Once you have clicked in the icon, next go down to the same ‘white rectangle with hole’ icon and click this. Now you will have a second Alpha 2 channel that is much darker. Your luminosity selection has been narrowed down to that bright cloud in the middle, just the area you want to darken down.
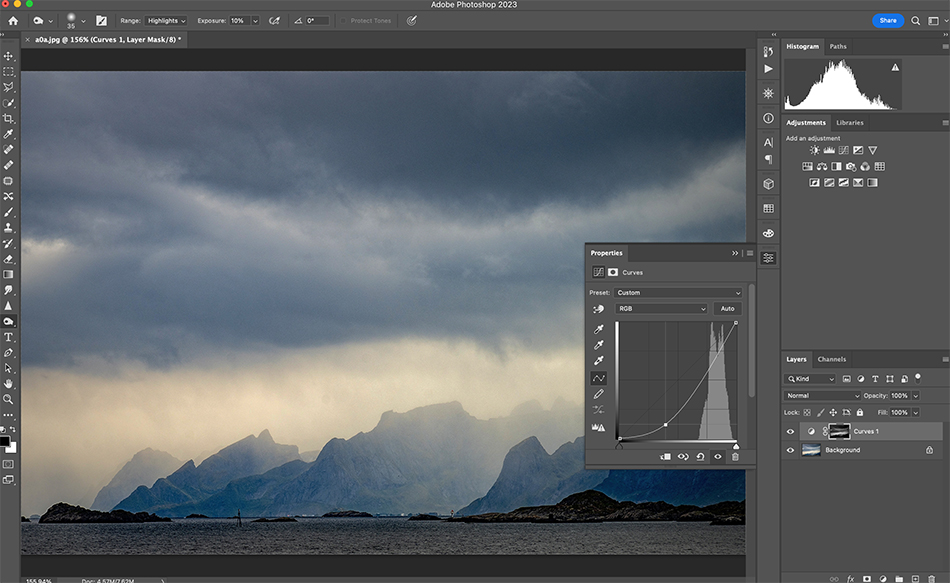
With the Alpha 2 channel mask still active (dancing ants on your image), click the RGB channel icon at top, and then click the layers tab above this. Now you are working on your original image in color. Choose a Levels Adjustment layer (in your Menu go to Window and check Adjustments to reveal this palette), and slowly pull the curve down to the right corner. Notice how you only adjust the bright center cloud area in the image. This is because your Luminosity mask has precisely selected this area.
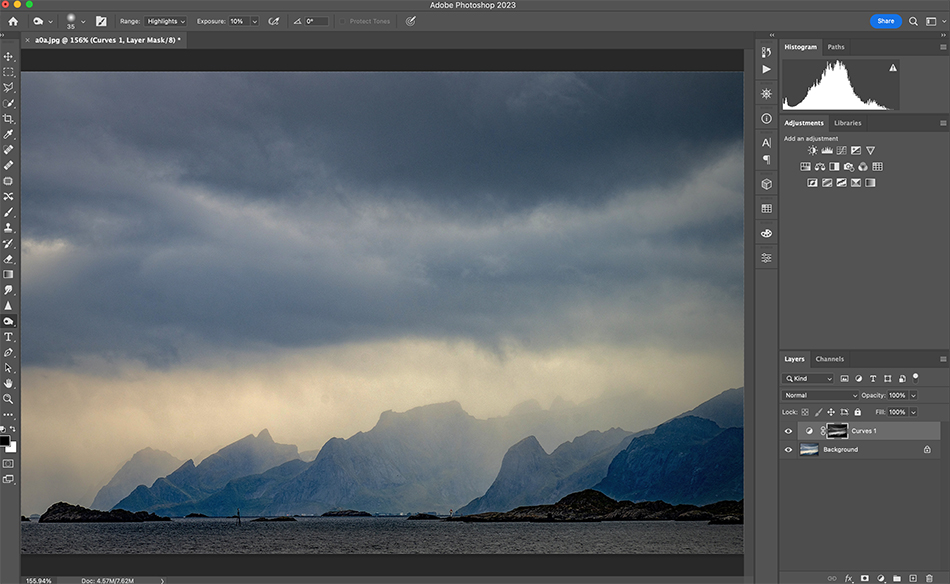
Here is the final image with the bright areas darkened using a luminosity mask. It might seem a little overwhelming when you do your first luminosity masks, but after awhile the process gets pretty easy. You can further refine these masks doing the method mentioned above. Or if you want to choose the dark areas you can invert your luminosity mask to do so. Lots of options as you dive into the luminosity mask world!
Masking is a great tool for every photographer to adjust their image. Whether you are using the new masking tools in LR or PS, or using a precise luminosity mask, we now have more control than ever in bringing our images to match our creative vision. If you want to learn more about masking, please join Cree and I on our upcoming online masking class. We will show you how masking has become central in our workflow.