LR had a recent update that added a few useful features, Select Sky and Select Subject. If you are working in Photoshop, you are already familiar with these two options…great to have them available in LR now. A few screens have been changed as well. Here is how this works:
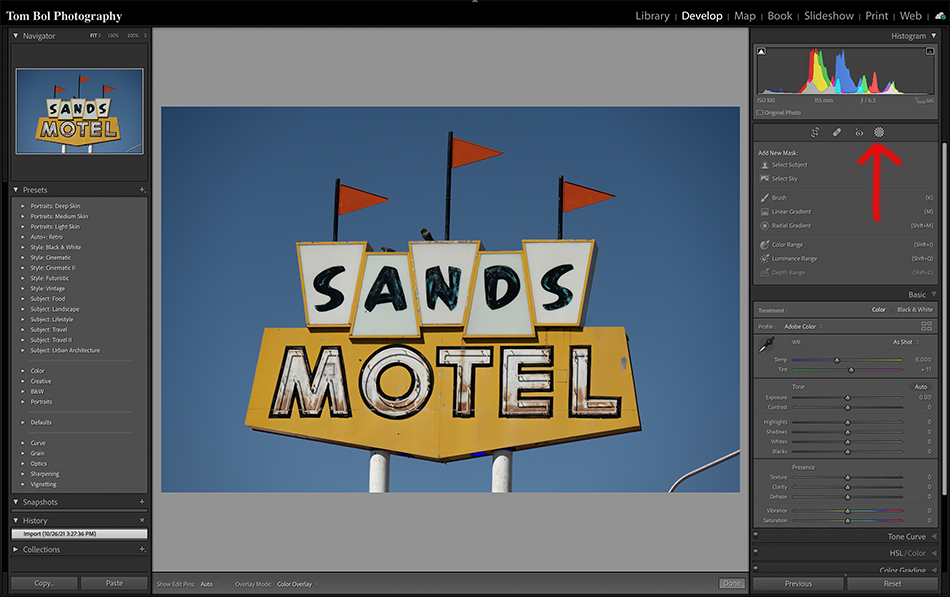
First, when you open your image in the Develop window you will see a new icon for the radial filter…this one has a dotted line around it (see red arrow in image at top). Click on that to see the new sub menu. This contains all the filters you remember including the gradient filter and radiant filter. But at the top there are two new choices…select sky and select subject.

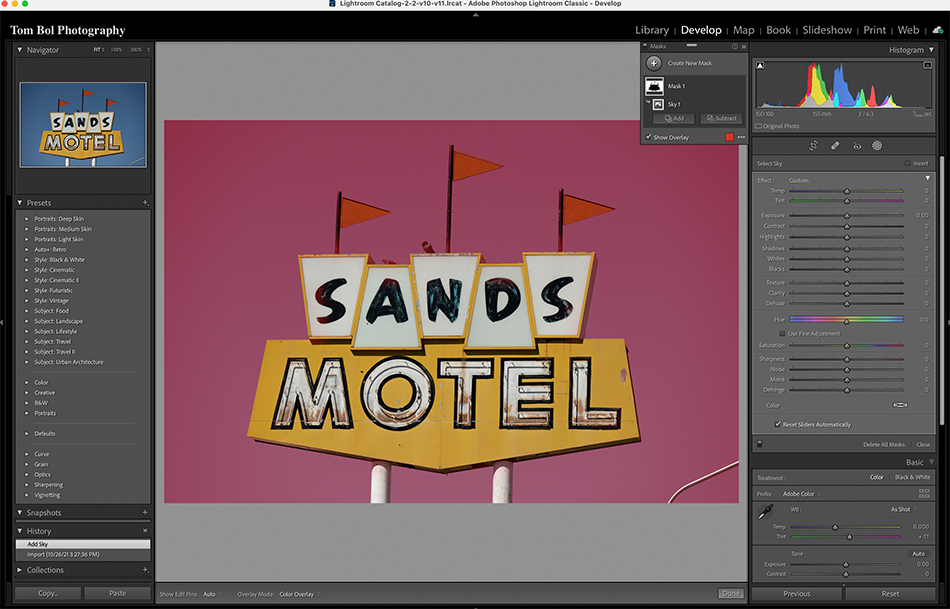
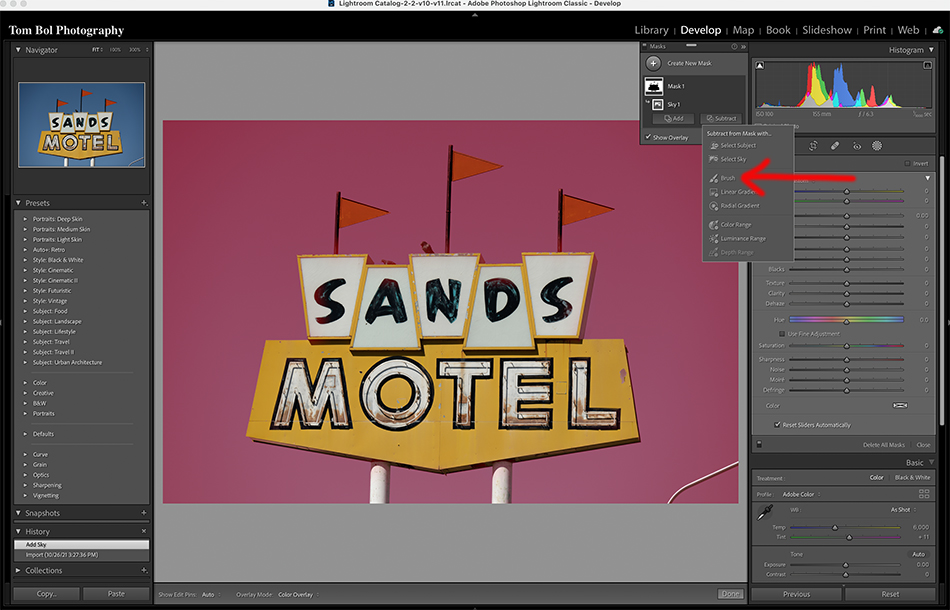
On this image I hit Select Sky. You will find the actual selection process works really well, both on sky and subjects. In this case LR had no problem selecting the sky, seen here masked in red. Now here is the great part. You will see two buttons at the bottom, Add and Subtract.

These do exactly what they say…choose the brush and Add or Subtract if the selection gets something you don’t want. I’ve been amazed how Select Sky selects detailed, busy skies, even through trees.

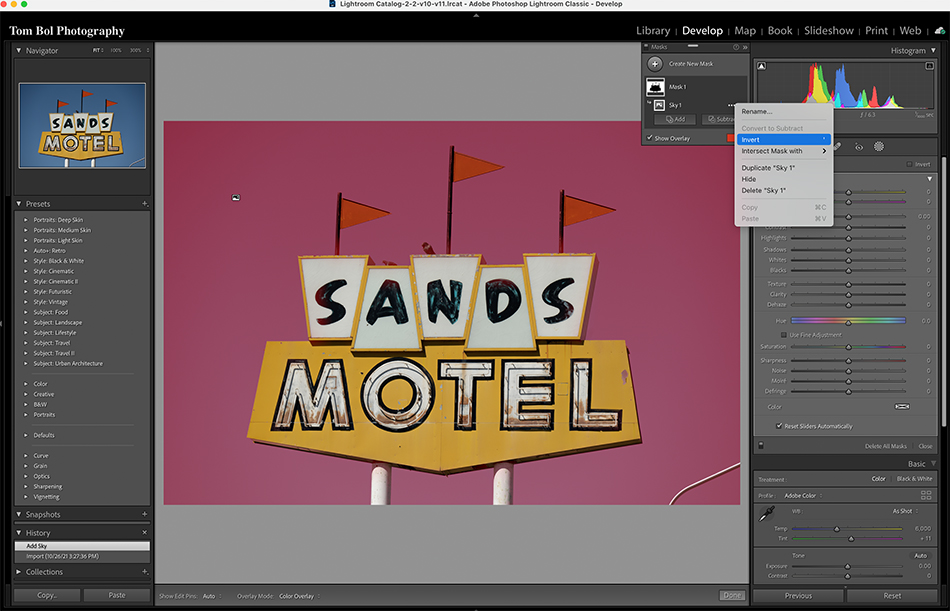
Another really useful feature is accessed when you click on the three little dots next to the ‘sky’ icon created when you chose Select Sky. This opens a window that allows you to inverse the selection. So after adjusting your sky, inverse the selection and adjust your subject using all the sliders you are familiar with in the Basic Panel. Very cool!
LR did some other tweaks including speeding up everything, which is always good. But now we have auto masking in LR thanks to Select Sky and Select Subject, and the ability to adjust mask selections using a brush. These features will be incredibly use for editing in LR!
Enjoy your weekend, and remember to get outside and take a few images. Being behind the camera improves your creativity and photo craft! Happy shooting!