We are winding down on the aurora season up here in Alaska, it has been an amazing winter. Last week we had another memorable event, KP 7, rainbow colors in the sky. On our aurora workshops we get a lot of questions about processing aurora photos, and since the lower 48 is also getting some good displays, I’ll run through how we edit our images. Here goes:
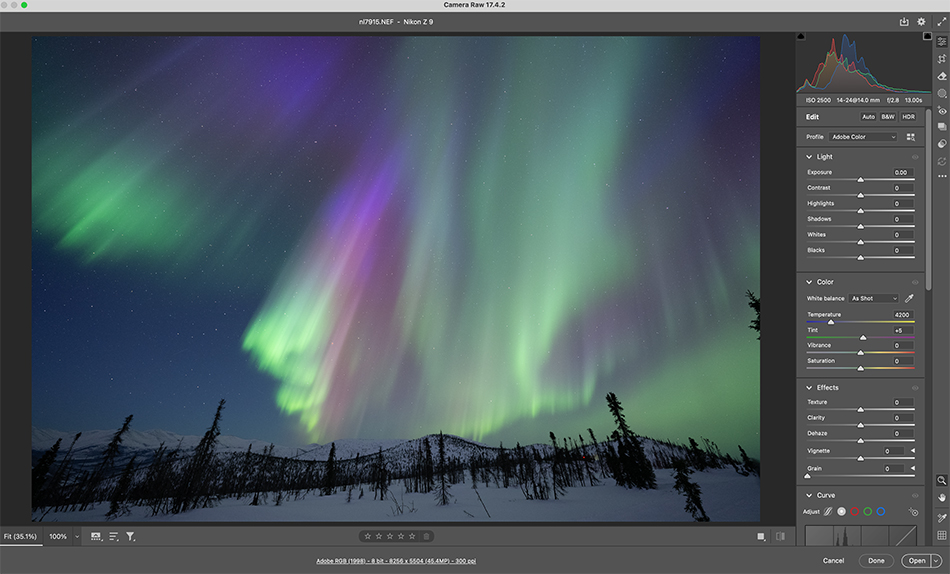
First up take a look at the image at top. This is how the shot looked on my camera LCD screen. 13 second exposure, F2.8 at ISO 2500. This display had blue, purple and green color, all visible to the naked eye, but much brighter after a 13 second exposure.
Since all my aurora images have high ISO to shoot at night, my first step is noise reduction. I use Adobe noise reduction which works well. I edit all my photos in Photoshop ACR, with any major distractions taken out later in Photoshop outside the ACR window. Processing in Lightroom would be similar. I normally use around 50 at the strength of my noise reduction.

Now I will do perspective control and any cropping. When you are using a super wide lens like a 14mm and aim it towards the sky, you will get the keystone effect in your image. The trees will bend towards the center. This is a subjective call. Sometimes I go for straight trees, other times I go with trees leaning inward. I have both types of images published, so editors are good with both looks, there is no right or wrong answer here.

Next I hit the ‘Auto’ button and see how it works. Sometimes this sets Light and Color sliders very accurately, other times it seems to blow out the highlights. If ‘Auto’ doesn’t work then I will manually set my sliders, making sure not to clip highlights in the Aurora. A lot of times I need to add some Exposure since I slightly underexpose to not overexposure the highlights in the aurora display. Contrast set to 5-8. Highlights moved to the left to reduce overexposed sections. Shadows slider to the right to open up shadows in the foreground. Whites and Blacks set by holding the Option key down and looking for clipping highlights (white move slider to right, blacks move slider to left, while holding Option key down).
An important camera setting here is your white balance. I shoot all my aurora with white balance set manually to 4200K. This seems to give an accurate look to the sky and aurora colors. If it is a full moon night I might move my white balance closer to 5000K.

To punch up the color and contrast I will next move my Dehaze slider to the right….maybe a setting around 15. Be careful here, it is easier to go way overboard with this slider. I also move the Clarity slider to the right, around 5-7, to add more contrast and defined shape to the aurora.

One thing you might notice about aurora photos in the snow is the snow picks up the color of the aurora in the sky. Snow often looks green or even purple with bright displays. I like my snow color to be white, so I fix that next. I make a mask of the sky, then invert it to select the foreground snow and mountains (you might have to touch up the mask selection using the brush). With the foreground selected, I grab the saturation slider and move it to the left, desaturating the snow color, which makes it white. Then I often go the Shadows slider and pull it to the right to open up the shadows some more. Now your foreground snow is white.

The last adjustment is sharpening. I normally go for a setting around 60-70 and mask around 35 (masking helps to selectively sharpen details and not empty sky).

Here is the final result. Nothing gets me more excited than seeing a beautiful aurora image come to life in editing. I just wish it wasn’t the end of aurora season in Alaska right now! If you are interested in joining us on an aurora photo workshop, we have space next year’s workshop.