During a recent workshop a familiar topic came up. Can you crop out parts of an animal for the final image? In other words, is it okay to have a bird’s wing going out of the frame. Or how about clipping the flippers off a seal, or the tail off a lion? I’ve sat on judging panels for photo contests and listened to judges say you absolutely must ‘have the tail’ in the shot. Or another big one…your bird photos aren’t as good unless the whole bird is sharp (another blog post!).
If there is one thing I’ve learned through 40 years of shooting assignments and working alongside national geographic editors, there are no set rules in photography. Different editors and judges will like different things for different reasons. Often it reflects their viewing audience. A photo editor looking for photos to illustrate a bird field guide will want a tack sharp bird in its entirety. But Nat Geo may publish a close up image of just a bird eye that is very colorful and graphic.
With ‘no rules’ in mind, this is how I approach wildlife photography and how tight I crop the image. First, and most important to me, is what graphic qualities make the best photo? And second, what is the end use? If a calendar company wants a full body tack sharp bird photo, then that is what I will shoot. But if I am shooting a story for Nikon, they are open to strong graphic wildlife images no matter the crop…their audience is focused on the graphic impact of the image.
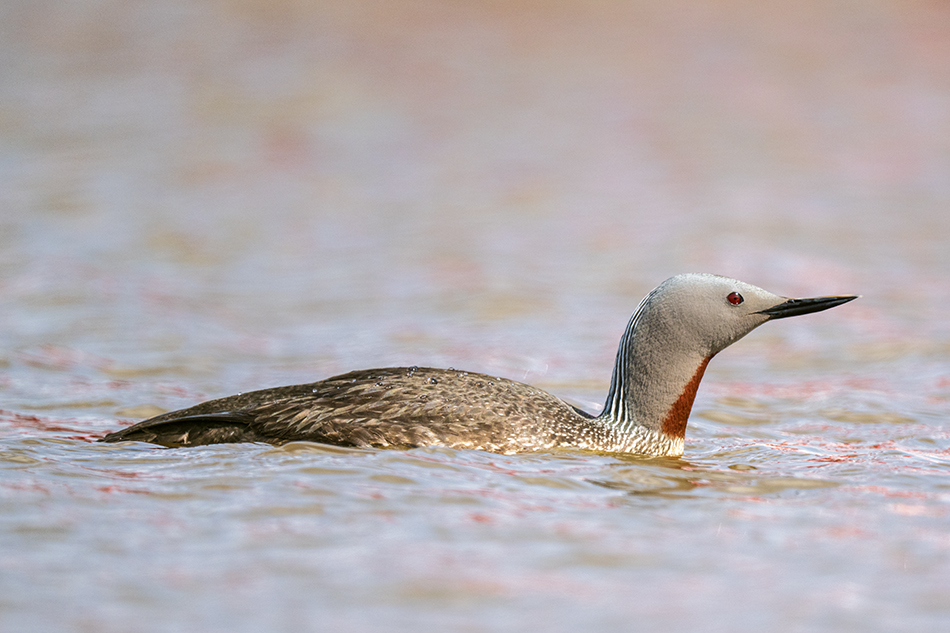
Take a look at this image. This is a red-throated loon on a lake, a nice ‘document the bird’ image, but not to impactful as a photograph.
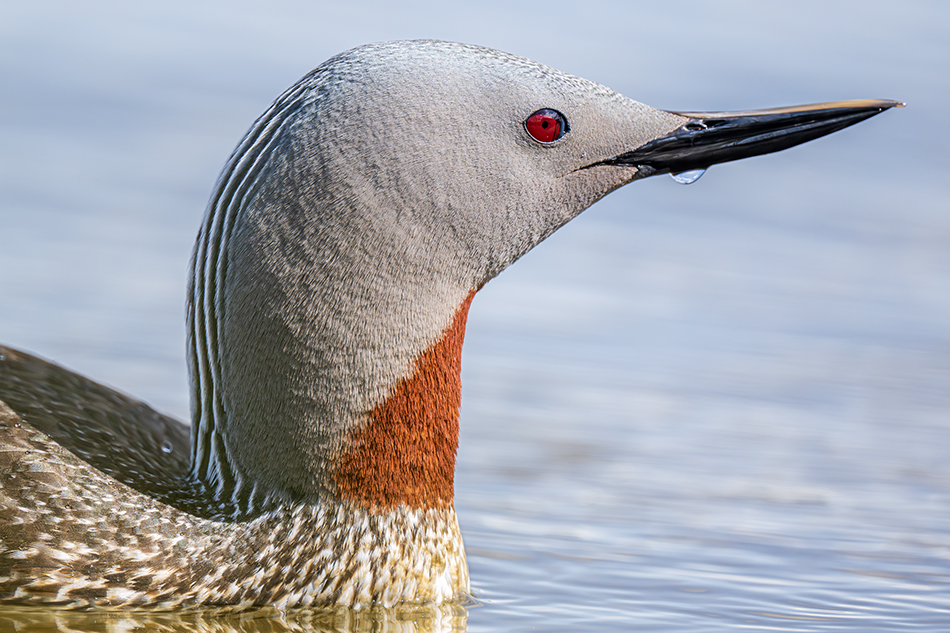
But then the loons swims really close, and you get this image (840mm, F5.6). The bird is literally so close you can only show the head and beautiful throat. Perfect! Much more graphic, gets your audience close to that throat and beautiful red eye…and now they can even see a water droplet hanging on the bill. How many people are missing the tail of the loon?
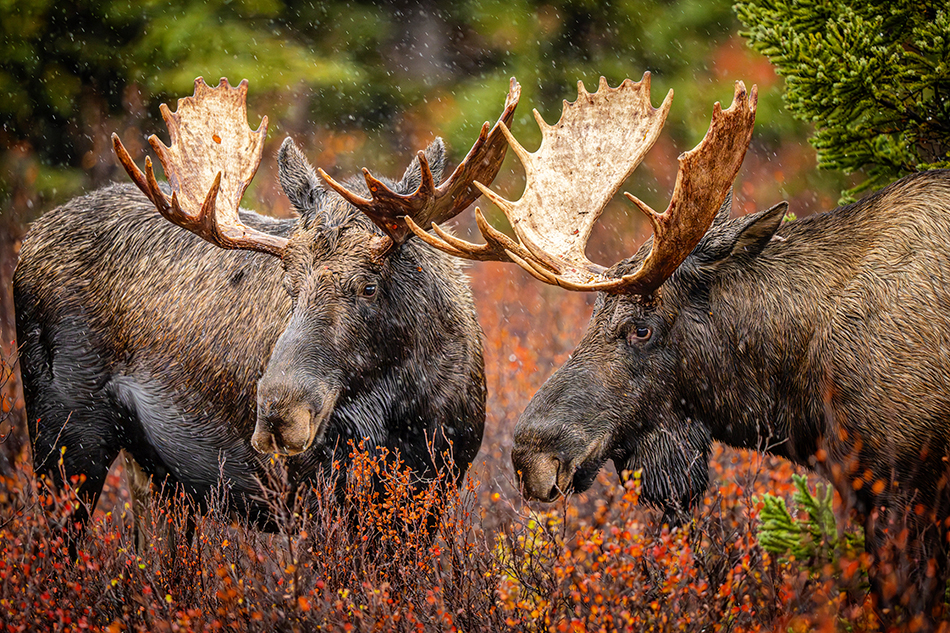
How about these fall moose. These towering bulls were right beside the road in Denali NP. My first images showed both of them together with no cropping of either moose. But I asked myself…what is really dramatic about this image? Of course it was their huge antlers. So then I starting zooming in and using the antlers as the focus of the image, and not worrying if I cropped out part of the body of one of the moose. Getting closer to the dramatic part of the image makes a stronger photograph.
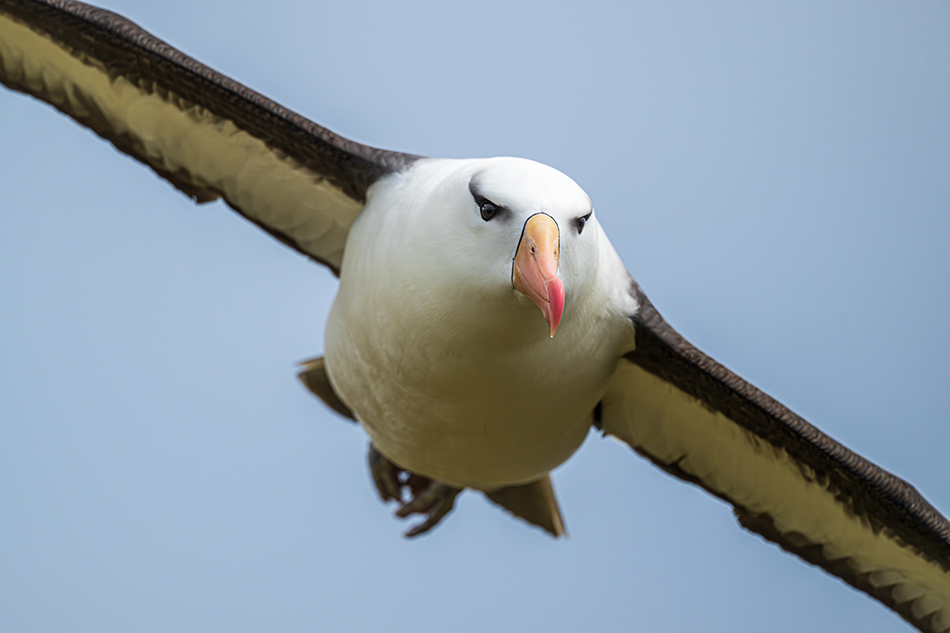
Here is an image bound to get some discussion. I know some photo judges that would say ‘delete’ because obviously the wings are cropped out and it doesn’t work. And many people may agree, a bird in flight missing this much wing doesn’t look good. But what if you really want to show the beautiful bill and eyestripe of an albatross head? I like this graphic non-traditional bird image. Once again for me I was responding to what I wanted to show in my image…not worried about ‘rules’ of photographing birds in flight. One solution here is shoot both, which I did. I had tons of full body albatross flying past, so I decided to try something different.
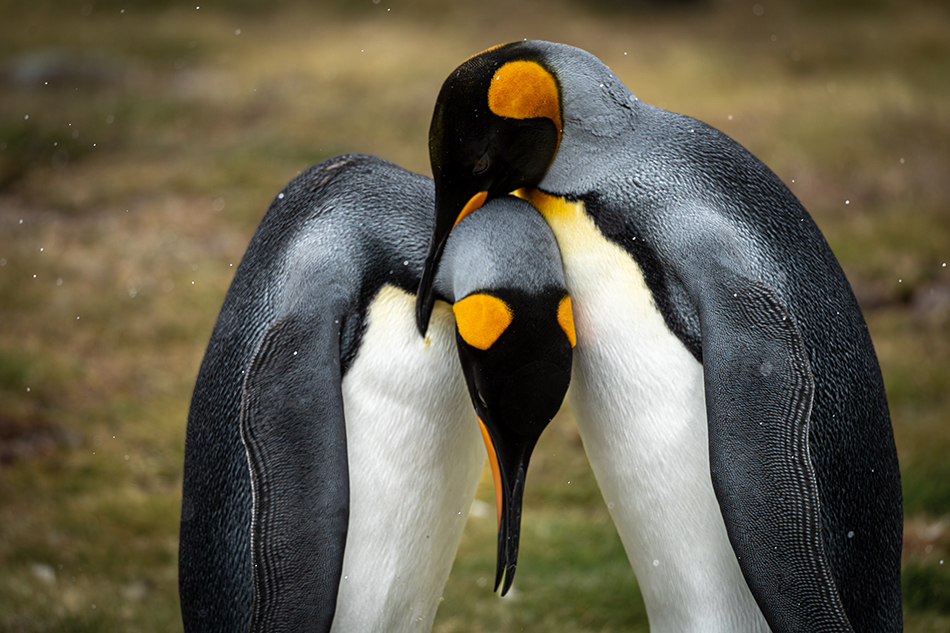
Here is another shot from Antarctica. Two king penguins in a tender moment. To me this image is about capturing the emotion and graphic quality of the birds. I could have included more of their flippers, but that wasn’t the strong graphic element…the heads and bills were.
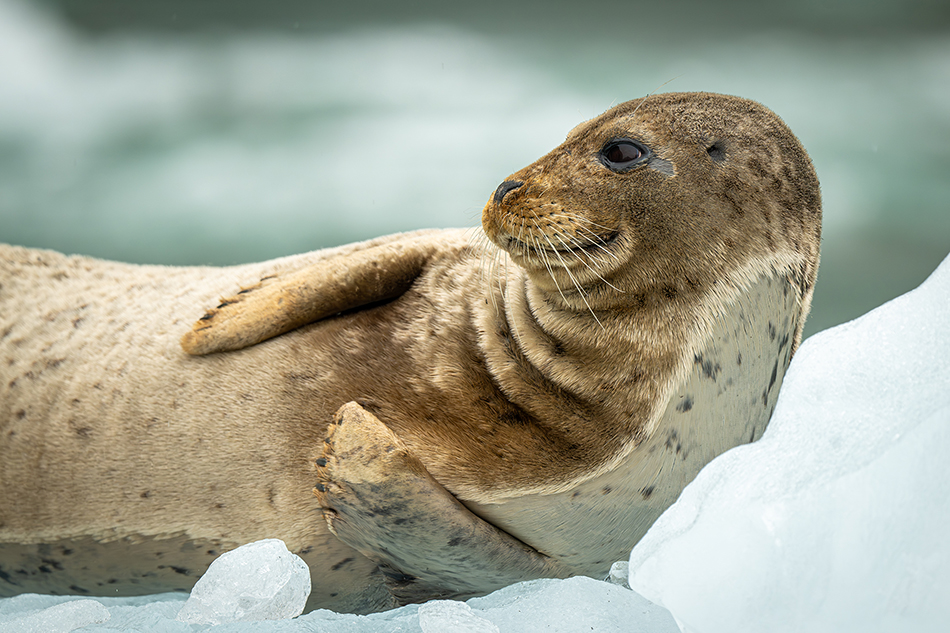
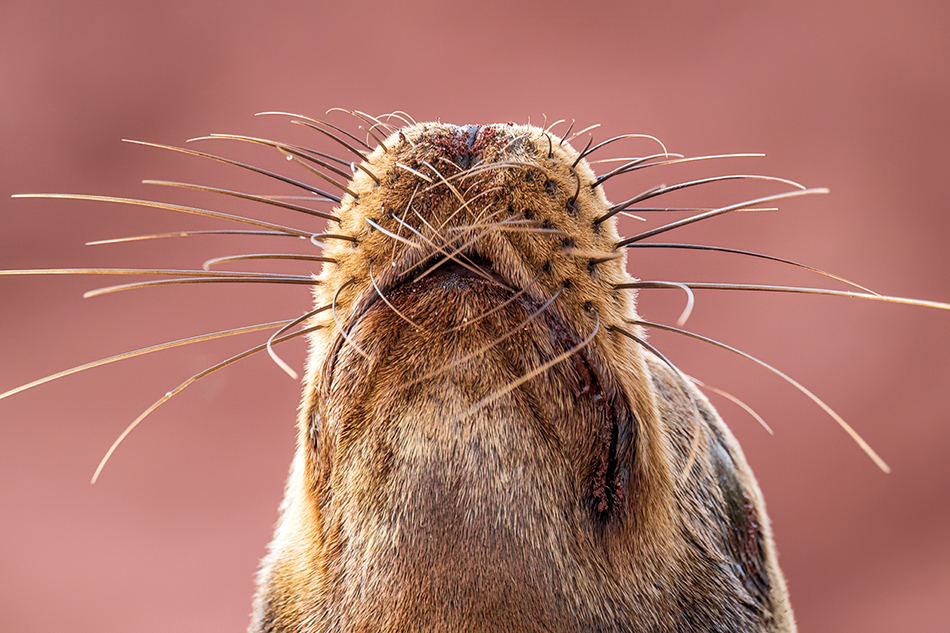
One last one. I was photographing harbor seals hauled out on icebergs near a glacier in Alaska, and it was incredible how close the seals were. Our boats just glided through the ice with seals sleeping and hanging out watching us go past. This one seal looked like he was watching TV…just hanging out. I took a few images that showed the entire seal, but I realized I really wanted my viewers to see up close his comical expression. So I zoomed in and did a tighter head shot. If I shot this again, I would try to zoom in even tighter just on his head.
If there is one take away from this post, I would say stay true to what is interesting in your photograph, and do what you can to emphasize that part of the shot. With wildlife, don’t fret about cropping out a body part if your final image is more graphic and emotive. And if you are really concerned about that missing tail, just shoot a little wider angle so you have both images on your flash card. Happy shooting!