One of the most powerful design elements photographers can use is color. Color evokes a strong emotional response from the viewer, and can help the photographer achieve their vision and concept. Often the first step in creating the color is choosing your white balance. Your white balance might match the scene, such as Daylight for a midday sunny photograph. Or you might choose a white balance to add color such as using ‘Cloudy’ on a sunny day to add a warm tone to your shot. I take it a step further and combine white balances, especially on twilight shots.
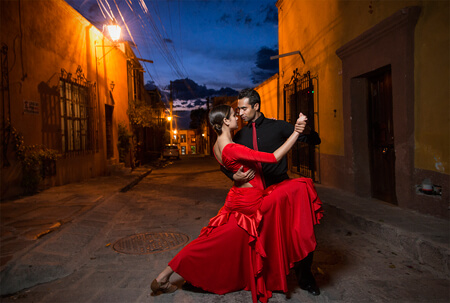
The image above was taken at sunset in San Miguel De Allende. These tango dancers were incredible, and we found the perfect narrow street for the shot. Tango is about passion, love, drama…and amazing dancing. To achieve this mood, we photographed the dancers at twilight in a street with tungsten lights overhead. The street lights would add a nice warm glow to the shot (with a daylight white balance), and the distant clouds would add some drama. Warm colors advance off cool colors, so the dancers in red and warm street light glow would be very dramatic. But with the final image, the street glow looked perfect, the dancers looked perfect, but the clouds looked gray. To solve this issue, I combined white balances.
There are numerous ways to add selective white balance. In Lightroom you could choose the adjustment brush and brush over the sky, then adjust the color temperature slider to warm up this area. With the shot above I double processed the original raw file. I saved one that kept the warm street light glow, and saved another with the white balance set to tungsten. I put the tungsten balanced image over the original shot, added a layer mask filled with black, and then brushed (using white as the foreground color) the tungsten (blue) sky to create ‘the right white balance’.