I did a training video a few years back for KelbyOne on creating time-lapse movies. Time-lapse sequences can be very simple or much more complicated like day to night sequences. But technology marches on, and cameras continue to advance with their time-lapse abilities. Top Nikon bodies have two choices for creating TL, one where the camera creates the movie in-camera, and the other using the intervalometer and putting the images together yourself. The advantage of the in-camera movie is just that; they show up on your flash card as a MOV file, ready to be dropped into your slideshow (great way to add a moving element to a still presentation). The intervalometer has the advantage of creating individual frames that you can use as a single still shot. Probably the easiest way to seam the pictures into a movie is using QuickTimePro (watch my KelbyOne video). You can also use a cable release with intervalometer if your camera doesn’t have one.
Here are tips for a basic simple time-lapse:
-put your camera in manual mode and set the exposure (I’ll take about day to night TL in another post).
-use manual focus
-set while balance, no Auto
-use a sturdy tripod
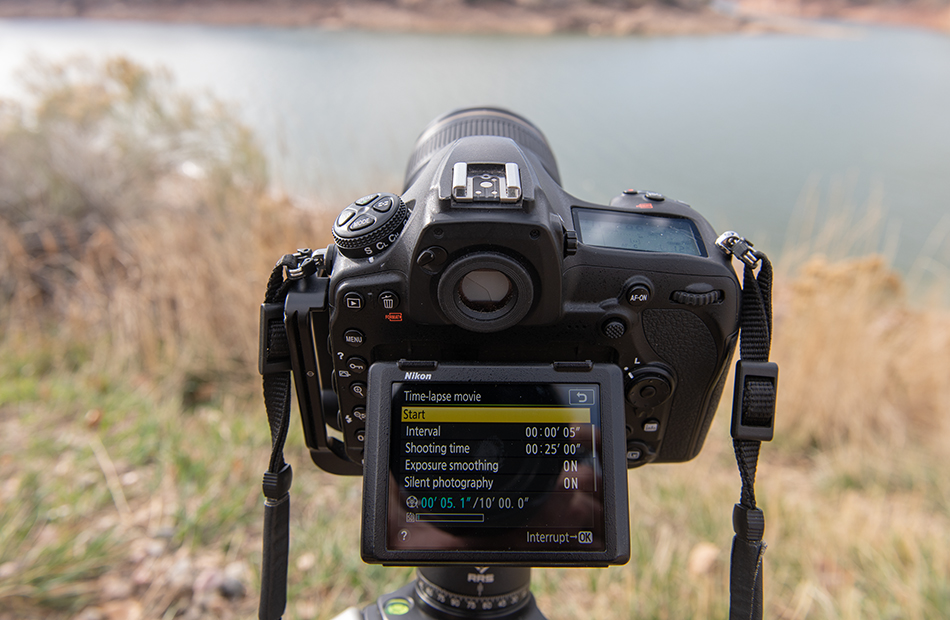
To set up a time lapse movie in-camera on the D850, do the following. First, go into the Movie menu and set your movie settings. Now scroll all the way to the bottom to Time-lapse movie. Click this and you will see the same screen you see on the image above. I like to use 30FPS at 1920×1080, large enough for my projector resolution during shows. You can always choose a larger size to cover higher resolution needs (or shoot 8K TL using the intervalometer). For many daytime subjects like clouds moving or cityscapes, I use an interval of 3-5 seconds. If I choose 5 seconds for my scene, then every minute I take 12 pictures. If I shoot a 25 minute sequence, that is 300 frames. Played back at 30FPS as a movie, I will get a 10 second clip, long enough for most of my presentations. Now the next two settings are just plain cool, thank you Nikon! One real problem with time-lapse photography is flicker. Flicker occurs when there is a slight difference in exposure, and it looks like a disco light blinking in your final movie. Exposure smoothing finds those trouble spots and smooths them out. This is huge, because it was very involved to do this in post production. Exposure smoothing works in A,S and P modes, and will work in Manual mode if you have your Auto Iso turned on. Bottom line, always have it turned on. Next is Silent photography, another brilliant feature Nikon added to the D850 that brings some mirrorless advantages to the D850. Traditionally on DSLR cameras each time a photo is taken, the mirror goes up and the shutter curtains move to get the shot. So it you do really long or lots of TL shooting, you are putting a lot of wear and tear on your shutter. But here is the beauty of the D850. Since it also has an electronic shutter, you can avoid wearing out your camera. With Silent photography mode turned on, the first frame in your sequence the camera will slap up the mirror, open the shutter curtains and take the first shot. But all the remaining hundreds of images the electronic shutter will do the work, so no more wear on your traditional shutter and mirror. Also, any vibration from the mirror is eliminated. Awesome! If you shoot a lot of TL movies, this is a huge plus. The next choice in this menu is Image Area, I leave mine on FX. Frame rate and size is next, choose 1920×1080 at 30FPS for a standard movie. Interval priority is the last choice; if you are shooting in manual mode then you can leave it off (if your shutter speed is faster than your interval). If you want to maintain your interval duration even if your exposure goes longer than your interval (such as during a day to night TL), turn it on.
Set up on your tripod, do one test shot to make sure everything looks good, hit the start button and wait 25 minutes for your award winning timelapse! In-camera time lapse is an amazing feature, and creates beautiful short movie clips to add to your shows.